
Colour Grading for Branding Photography Clients, Why It Matters and How to Approach It.
Colour grading has been a cornerstone of the movie industry for decades, used to shape moods, guide emotions, and create signature looks that resonate with audiences.
In branding photography, colour grading serves a similar purpose: it’s about crafting a visual identity that supports and strengthens your client’s brand story.
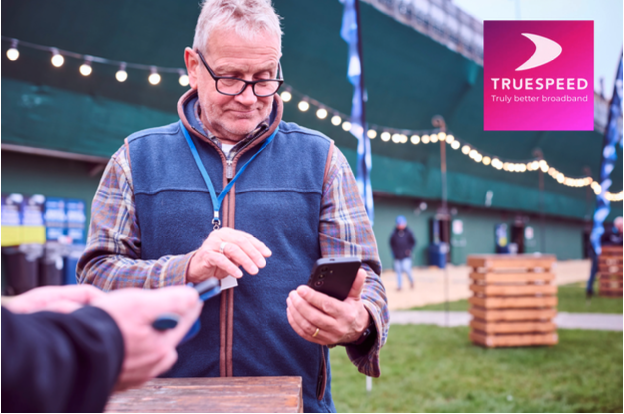
Image above: colour graded magenta to fit in with the client's brand/logo.
Start With the Brand Guidelines
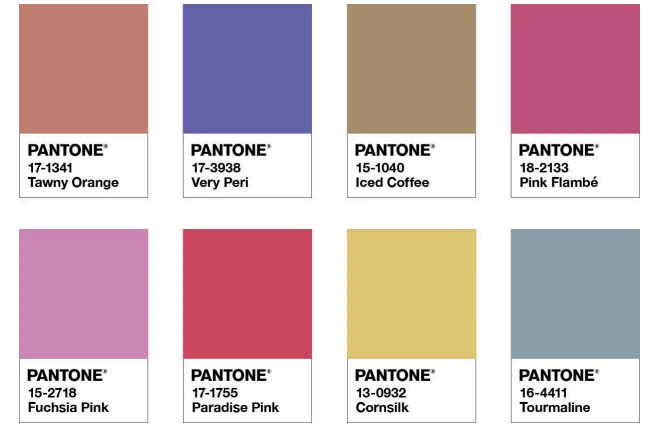
Pantone Colours
Before touching your editing software, begin with the brand.
Most clients have brand guidelines that include:
Brand colour palettes
Primary and secondary colours Pantone references
Tone and personality descriptions
Pantone colours aren’t about pixel-perfect matches; they serve as a colour compass, guiding your grading choices to maintain consistency with the brand’s look and feel.
Using Brand Colours as a Grading Reference
With brand colours in mind, you can tailor your grading approach:
Warm, approachable brands → warmer highlights and skin tones Cool, tech-focused brands → cleaner whites and cooler shadows Muted, premium brands → softer contrast and restrained saturation
This creates seamless harmony, where images “sit” perfectly on client websites and marketing materials that use the same brand colours, thus making the brand feel cohesive and trustworthy.
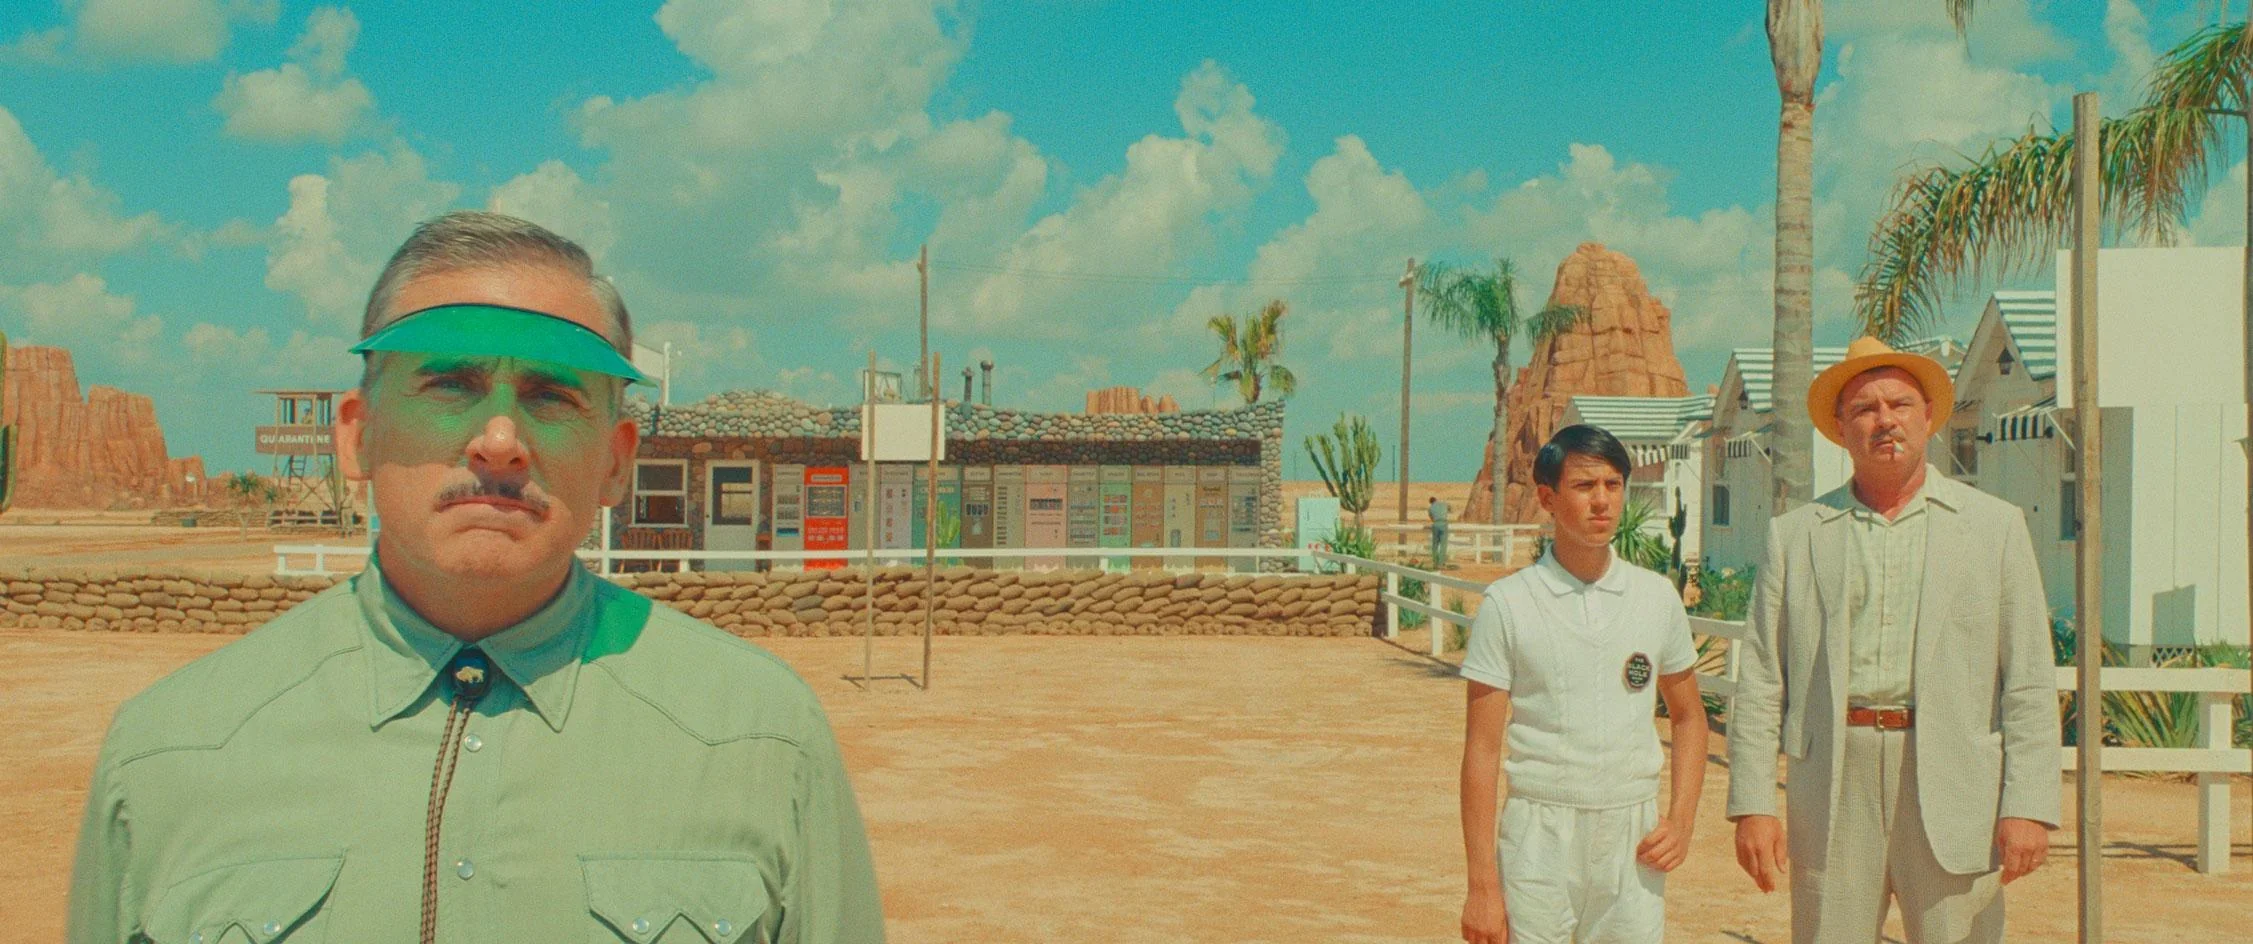
Wes Anderson - Asteroid City
Lessons From The Movie Industry
The cinematic world has long recognised the power of colour grading in storytelling.
From classic Hollywood films to modern blockbusters, colour grading helps:
Establish mood and tone
Highlight characters or themes
Maintain visual continuity across scenes
Great examples of color grading include stylized films like Wes Anderson's Grand Budapest Hotel (pastel symmetry), moody sci-fi like Blade Runner 2049 (yellow for enlightenment, orange for warning), gritty thrillers like Sicario (yellow filter for border), visually rich dramas like In the Mood for Love (lush reds/greens), and the expressive palettes in Joker (teal/orange)
As branding photographers, we can apply the same principles to create images that tell a brand’s story with subtle emotional cues through colour.
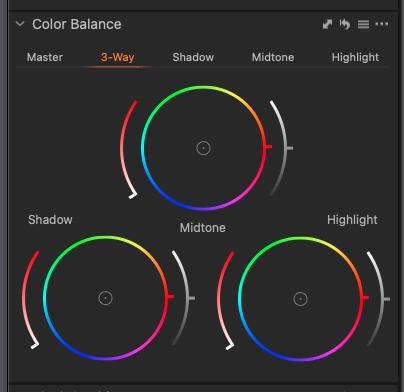
Colour grading on Capture One
Best tools for the job - colour wheels
When colour grading with colour wheels in Capture One or Lightroom, I think in terms of shadows, midtones and highlights rather than global colour shifts.
I’ll often cool the shadows slightly, warm the highlights, and keep midtones — especially skin tones — neutral so the image feels natural and balanced.
Small, controlled adjustments go a long way; colour wheels work best when they’re used subtly to support the brand mood rather than overpower it.
My Colour Grading Tip:
Whichever software you choose, start by correcting exposure and white balance first. Then, use brand colours and mood as your guide to dial in your grading. This will help in keeping it consistent across the entire shoot.